Tag Team Backup – Digital Photography Workflow
Years ago I wrote a post on my file workflow. That is, what I do with my files once I pull them off the card to make sure that they don’t disappear. Since then I’ve made some changes to my workflow so I thought I’d write a little update to that old post.
One of the major problems with modern digital photography is that we tend to take a lot of pictures and need somewhere to put them. Strangely enough, I don’t shoot that much in comparison to most photographers, even many amateurs. For instance, my typical editorial shoot is 150 images on average. I have some event shooting friends who take more pictures in a day than I shoot in a month. So all together once I do all the math, almost everything I’ve ever shot can fit on a little over 3TB. Nothing for most photographers, I know. I still need to work on those files and backup my data however, so here’s what I’ve come up with that works for me.
The Jump to a RAID Array
I found myself waiting for 2GB heavily layered PSD files to be read and written to disk and so started looking for ways to speed up the process. The thing is that I’m a real stickler for noise and so moving to 7200RPM drives, which I find much more noticeable, was a no go. I’m also not made of money so the idea of swapping out all of my photo drives for SSD is not yet a reasonable solution (though it may be soon, more on that below). So the answer I came up with was to bond two of my WD 2TB Green drives together in an OS X software RAID-0. This doubled my throughput to around 180MB/s which is pretty good. Reducing my save/load times by almost half. Of course the big problem with RAID-0 is that if either of those drives died, all of the data on both drives dies. So when you play with RAID-0 make sure you have an extra special backup strategy in place.
Off Site First
 The most important part of backup is to get data off site. So if your house burns down or gets pulled down a river, you’ve still got your data. Now for me with a 5Mbps upstream connection, having a true one to one backup of my data drives up on the cloud just isn’t a reasonable thing to do, it would take months and months to upload. And honestly, if my house burns down, do I really need the RAW files for outtakes that didn’t make the cut in the first place?
So a while back I instituted a system of exporting my final images as full-res jpegs at 85/100 quality and uploading them to Dropbox. This both gets them out of the house AND allows me to access final print-ready copies of my work when I’m out and about or on vacation. I can send email links to any of the files right from my phone. So it’s convenience AND backup for which I pay $100/year.
Plus, instead of 3.2TB of data, my entire ‘Finished Images’ folder, everything I’ve ever shot that I care to keep, totals a whopping 20.5GB I could keep a copy local on my phone if I really wanted to. Or on a keychain USB drive I guess, that’s not a bad idea actually…
Tag Team Backup
The proliferation of inexpensive USB 3.0 drives has been a great boon to backup users everywhere. For one thing they’re cheap. Often cheaper than the bare drive that’s enclosed within goes for, and they’re seemingly always on sale somewhere. I’ve bought two 4TB Seagate drives in the past few months for about $150 each. That’s just nuts. Here’s one on Amazon right now for instance:
Seagate Backup Plus 4 TB USB 3.0 Desktop External Hard Drive on Amazon.com
The trick to my backup solution is to have two drives to backup to, but only backup to one of them at a time. One drive is on my desktop, the other is in my closet. Once a month (I switch them when I write my rent check) I swap the two drives so that the one in the closet becomes the one on my desk and vice versa. You may ask ‘Why?’, but I assure you there is a good reason for this.
Once you have a backup system working, the nightmare scenario is that data on your main library drive becomes corrupt or something gets accidentally deleted and an automated backup goes and clones those mistakes to your backup drive before you realize it. So now you’re left with not one but two drives which don’t have your data on them. By having two backups that you swap in an out, you always have a backup that’s not going to be automatically overwritten which is no greater than a month old (or a week old if you swapped them weekly, or a day old if you swapped them daily, etc). Another ancillary benefit is that the drive in your closet is not connected to power, so that if that random power surge or lightning strike kills your electronics, your data is covered.
Image Library on SDD
I mentioned above that the idea of putting all of my images on fast SSDs had occurred to me. The prices of the drives has fallen A LOT in the past year or so. To the point where you can currently buy a 960GB drive for $500. Still a little too rich for my blood, but if I archived the old stuff to a couple of external drives and kept my library tidy, I could probably get it to fit within 2TB or so. And that would only cost about a grand. A lot of money? Sure, but not completely astronomical like it would have been a couple of years ago.
It’s certainly to the point that the next time I build myself a new computer, I’ll probably make the switch. Hopefully by then the price will be down to $250/TB. Imagine two or three of those drives as your RAID-0 array. Loading images at 1.6GB/s would be pretty nice. Necessary? Nah. But pretty nice.
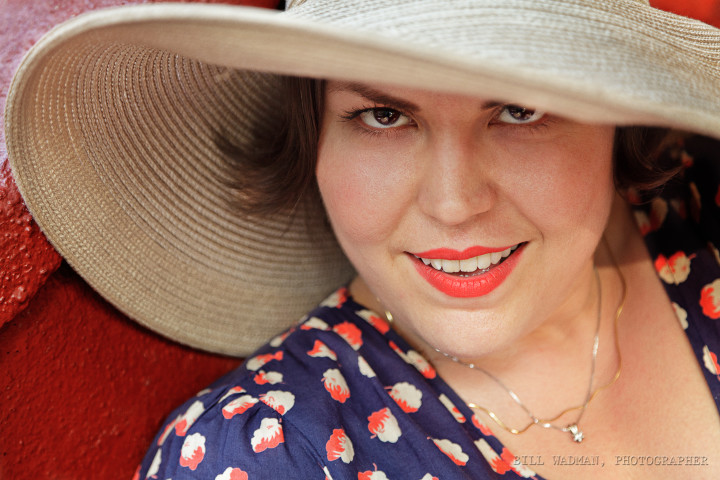
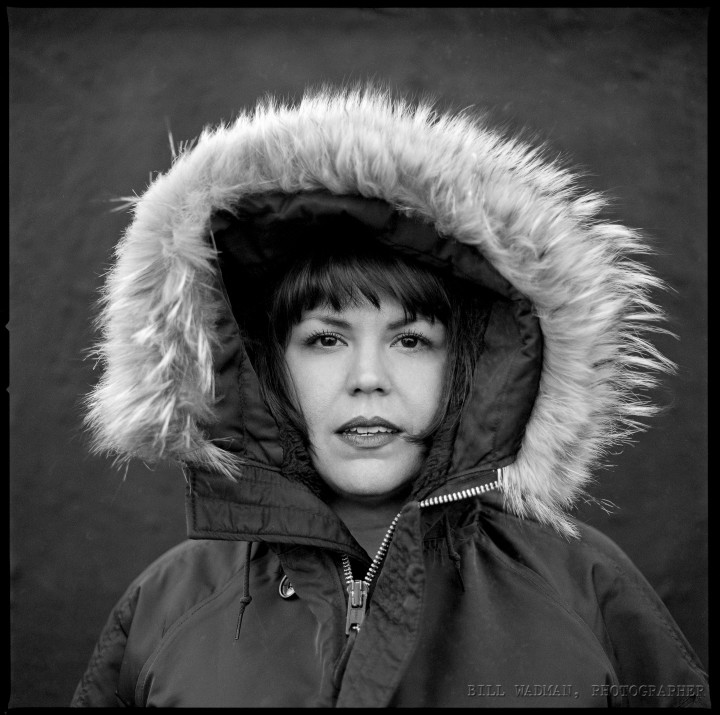
On Eleanor
I got some terrible news last night. My good friend and muse Eleanor had died suddenly while visiting family for the holiday. No warning, no sickness, no time to say goodbye. She was one of the outliers the entire time I knew her. I would often use her as an example in conversations when I needed an example of someone who confounded the world’s expectations. Sassy to the nines and always so incredibly full of life that I can hardly believe that she could possibly be gone.
If you needed another reason why you should never wait to do that thing you’ve been meaning to do, or tell someone that you love them, here it is.
Below are a few of the photographs I made with Eleanor over the years.
Family Photo Restoration
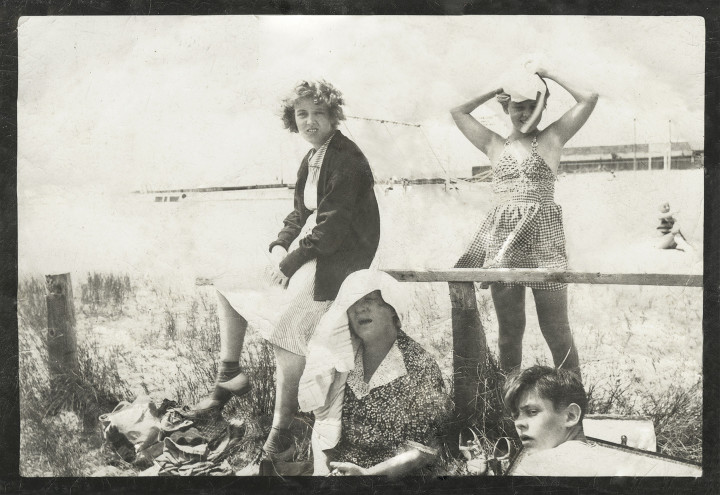
My partner brought a little present home for me from her mother’s house. Less a present really, more of an assignment. Her mother had found this picture of HER mother and sister and grandmother in some drawer or other. It had been battered and beaten and probably put through the wash a few times, but they wanted to see what I could do with it.
Step one was to scan it in order to get as much information as possible out of the original. Pulled my old Epson flatbed out of the closet and plugged it in, fired right up. Scanned it to a TIFF file at 1200dpi. Not that there was anything near that much information in the print, but I find that when doing restorations like this, the higher resolution let’s you more easily discern between the image and any physical flaws that have befallen the print. If you don’t have a scanner, you can also take a well exposed picture with your camera and start with that. Just make sure you light it from the side so you don’t get reflections in the image.
Most of this kind of work can be done in Photoshop using things like the spot-healing brush and stamp tools. Certainly when it comes to creases across a largely white sky those techniques work pretty flawlessly. The problems come when you need to invent information. The places on the print where the image has been torn away for example, that’s information I have no way of getting back. For things like the pattern in their dresses, you can use the healing tools to mimic or clone in the pattern from elsewhere to good effect. Other areas like the swing set to the right of the central girl, I can’t accurately recreate that. Best I can do, within reason, is to use the surrounding image to guess, and that’s just what I did.
Overall not bad considering I only spent an hour or so on it. Is there room for more work? Sure, but you’re quickly approaching the limits of your return on time invested. We want to save and perhaps restore the memory a bit, no need to go all Ken Burns.
I also could have increased the contrast even more and desaturated the whole thing entirely. That would probably deliver an image that was much closer to how the print looked in the 1930’s, but also kind of loses some of the Age that the print has imbued on the memory. So in the end I pulled back the contrast and desaturation layers to let it feel a bit more like the original.
Either way it’s a good ‘waiting for the snowstorm’ project, and a great way to get your feet wet in PhotoShop. You’ll learn how to use layers and healing/clone tools, as well as adjustment layers and color. I highly recommend you get a tablet to do work like this. Trying to do this with just a mouse would be like doing a fine pencil drawing while wearing ski gloves. The less expensive Wacom tablets are a great deal, and a good place to dip your toe in the water.
So go rummage through some drawers and give it a shot. Your children and your children’s children will thank you some day.
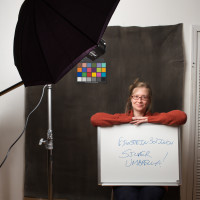
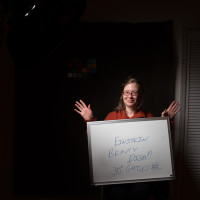
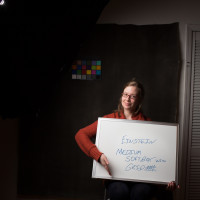
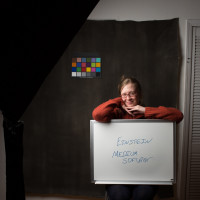
It’s Not The Umbrella’s Fault – Einstein / Speedlight Modifier Shoot-off
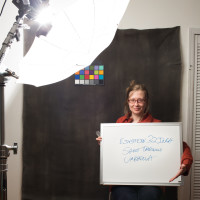
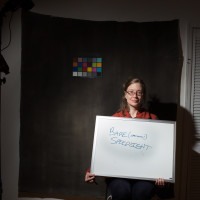
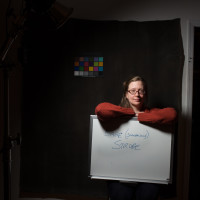
I mentioned last week on the show how I felt like a speedlight and an Alien Bee looked very different through the same umbrella at the same subject. So I thought I would put it to the test.
Conrad sat in for me while I shot her from approximately two feet with:
A Paul Buff Einstein w/
– 7″ reflector
– 32″ shoot-through umbrella
– 32″ silver umbrella
– 22″ beauty dish
– 22″ beauty dish with 30 degree grid
– 22″ beauty dish with sock
– 24×36″ softbox
– 24×36″ softbox with grid
A Lumopro 120 Speedlight w/
– bare
– 32″ shoot-through umbrella
– 32″ silver umbrella
– 16″ softbox
The images were color corrected in Lightroom using the color chart on the wall.
And you know what? At least for the soft sources, they all don’t look THAT different from one another. So maybe I’m wrong. What do you think?
UPDATE:
So I’ve taken a look at them after a short night’s sleep and I wanted to point out a few things. While the light from the umbrellas and softboxes and such look pretty similar from a couple of feet away, you will notice that there is a huge difference in their spill into the rest of the scene. So if you need control over your lighting, some options are definitely better than others.
Also even though I was using strobes that ‘should’ more or less be about daylight balanced, there was a wide variation of white balance settings in post to get them in line with each other. The light from the Einstein for instance had color temp of 6000º, 5950º, 5250º, 5100º, 5500º, and 5000º depending on the modifier being used. The speedlight was even worse, 6600º, 6900º, 7500º. Remember that next time you use a strobe and think you can just set your WB to Daylight or Flash and call it a day. Nope. When in doubt, shoot a grey card at the beginning of your session so that you have a reference in post.
For me, it comes down to convenience to a large extent. If I have to carry my gear to a shoot I want to get the most bang I can get for the size/weight buck. For me lately that has been a couple of 36″ Softlighters from Photek. They fit criss-cross in my Pelican rolling case and can be used as white umbrellas, shoot-through umbrellas, and as designed with the front diffuser. Three tools in one. (Plus they’re cheap!) That said, yesterday I was shooting some corporate headshots and brought along an Alien Bee with a 46″ Softlighter and the light from that much larger source (remember, the area of a circle is π times the radius squared so it’s about 50% more area than the 36″) was lovely. Wrapped around so nice that I didn’t even need a reflector.
In the end though, soft light is soft light. How you make it and how ‘soft’ it is largely academic. If what you’ve got is an umbrella, it’ll be fine. If you’ve got a softbox, use the softbox. Stop worrying about the 5% difference in the quality of light and start worrying about making better photographs. Let me put is this way to wrap up: If you’re pictures aren’t good enough, it’s not the umbrella’s fault.
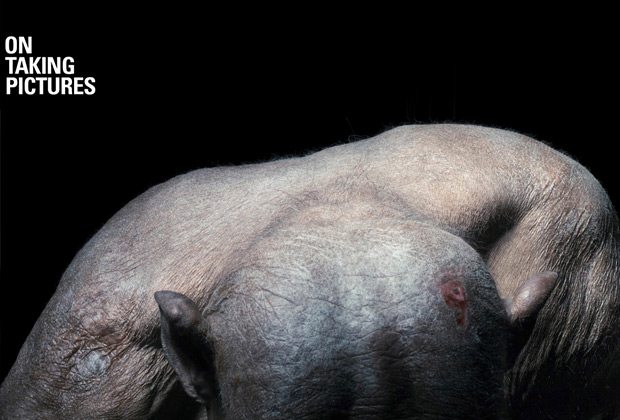
On Taking Pictures #82: Going ‘All In’ On Yourself
This week, should exceptional talent be a gift or a chore? Does what you do have to feed your soul to be important, or is just doing the work enough? Also, when are too many options not a good thing? Plus, we discuss the new documentary “Everybody Street” and Tim Flach is our Photographer of the Week.
Show Notes
Bruce Springsteen – Wings For Wheels – The Making of Born To Run
Are We Happier When We Have More Options? : NPR
Katy Perry ‘Prism’ Good Example How Albums Don’t Work Anymore | Variety
EVERYBODY STREET
Writing Wednesdays: Resistance and Self-Loathing
French newspaper removes all images in support of photographers – British Journal of Photography
Analogue Forever: Film Talk with Lars Fielder of Kodak Alaris – Lomography
This Week’s Sponsor
Squarespace Use the coupon code PUSHTHETRAIN at checkout to save 10% on your order.
Photographer of the Week
Tim Flach
Books We Recommend
Equus
Dogs
More than Human
Fuji x100s Travel Camera Review
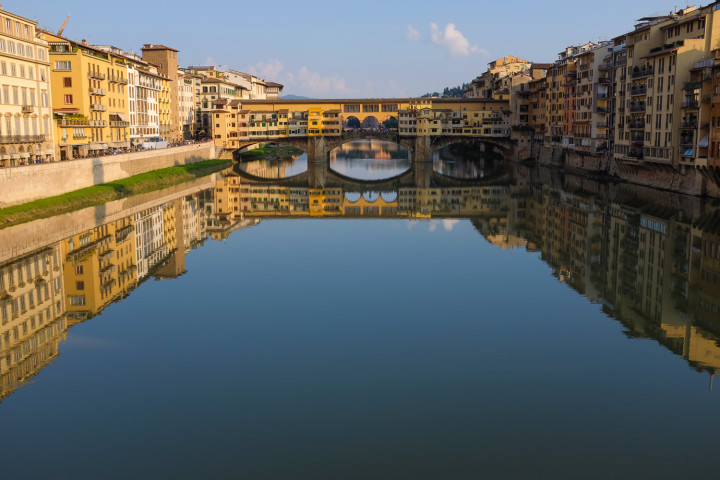
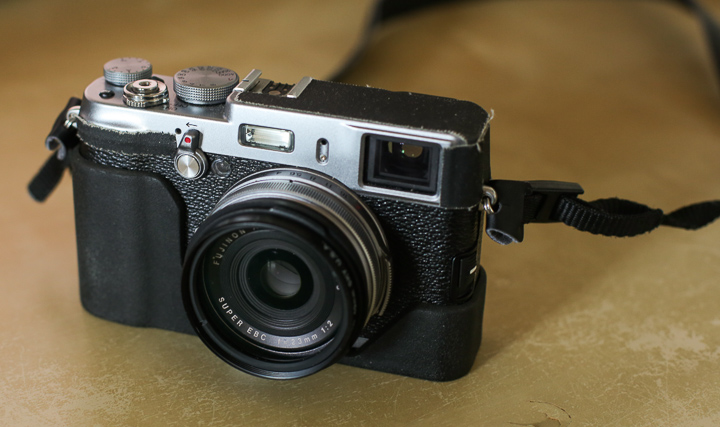 Before my recent week-long trip to Italy, I was agonizing over what camera to take with me. I wanted something smaller and lighter than my workhorse 5D Mark III. Something inconspicuous which still took great pictures. I ended up buying a Fuji x100s based upon the raving reviews of almost everyone I could find who had actually used one. “Perfect”, I thought, I can get all the fun of my M4 but with a nice little digital sensor and for 1/8th the cost!
The camera did an admirable job and proved itself a solid piece of kit, but not without it’s foibles. Read on…
Image Quality
Assuming your focus, exposure, and technique are solid, the image quality of the Fuji x100s is really incredible. Especially within it’s limits of an 16MP APS sensor, the per pixel sharpness was just amazing. Much of this has to do with random RGB layout of the X-Trans sensor which lets the engineers do without the standard anti-aliasing filter while still avoiding any moiré that would normally crop up.
I had my camera set to auto-ISO with a max of 3200 for the whole trip and image noise was never a problem. It’s not to say that 3200 was identical to 100, but the camera’s noise reduction functions did a great job of not being too heavy-handed in its work. Files taken at night have a bit of grain, but honestly, they should considering the amount of light they were taken in.
The files were so good that I shot jpg files the entire trip, and I’m a die hard raw shooter from WAY back. I didn’t want my trip to feel like work and I wanted my use of this camera to more closely mimic a film rangefinder. I didn’t want to come home and play with every image in ad infinitum. I wanted to be satisfied with the images out of camera. This was possible because the jpg engine in the Fuji is top notch, and is much better than in any Canon I’ve ever used.
Its auto white balance was typically great as well. The handful of situations where it struggled involved terrible mixes of argon street light and fluorescent signage; a scenario where there is no right answer anyway. However, once again the auto setting did much better than my Canon has ever performed in these situations.
Focal Length
The x100s has a fixed 35mm equivalent f/2 lens on it and the glass is great. I rarely shot wide open, but there is little for me to fault. Much like the little 40mm STM lens for my Canon, it’s a great little lens in a small package. Anyone complaining about the optics either got a broken camera or doesn’t know what they’re talking about.
As for being stuck at a single focal length, my readers will know that I like primes. I also like being limited when I shoot so that I have to work a little harder to get the shot. For a trip like the one I was just on, a slightly wide lens like a 35mm is perfect. Wide enough to get a sense of the environment in the shot while not being so wide that you have to get 2ft away from your subject.
Were there times when I would have liked something different? A few, but those situations typically required something even wider. A nice 28mm would have come in handy every once in a while. Fuji makes a 28mm adapter for the camera, but it’s far too expensive in my opinion, so I never really considered it. If they had offered the camera with the option of a built-in 28mm, then I would have had a hard time deciding. I like wide.
For the handful of times that a longer lens would have been useful, you can always crop. Personally, I’m fine with letting some pictures go. I’m in Italy to see the art with my eyes, not spend the whole time with my face in the camera.
Viewfinder
The viewfinder is really a tale of two technologies. The x100s has a hybrid viewfinder which lets you switch between optical and electronic, so we’ll take each one in turn.
The optical viewfinder drew me to this camera in the first place. I wanted a digital Leica M without having to spend 8k, and the Fuji has a few neat tricks up its sleeve. For example the frame lines in the viewfinder are created by the LCD screen from the EVF. This means they can move to compensate for the parallax between the OVF and lens when you’re focused on subjects close to you. This feature gives a more accurate framing in these situations, but accurate framing on the OVF became one of its downfalls.
You see, I found that the camera captured a lot of image outside the framelines in the OVF; about 5% more ended up in the picture outside of what the framelines suggested. This was very annoying when you were trying to frame the image in a way to keep distracting elements out. In these situations I ended up switching over the the EVF so that I knew exactly what was going to be in the shot.
I didn’t expect to use the EVF much, but I did in the end, often to get an idea of the exposure the camera was giving me. When you’re inside a dark church with bright sunlight streaming in a window, it’s often hard to tell what the auto-exposure sensor is going to highlight. There were a number of times that I dialed in a -1 exposure compensation only to find an image that looked like a +1. It seems my idea of what I wanted and the camera’s computer were a bit out of sync at times.
The EVF did its job, but I still don’t like it. It feels like I’m staring at a low-quality LCD screen, not a viewfinder. It’s not that there was a lot of lag, it just feels one step further removed from the subject to me. Also, the highlights and shadows in the EVF often looked blown out or crushed when in the final image they were within the histogram. The panel they use for the EVF apparently doesn’t have the dynamic range that the files do, which makes it hard to see what you’re going to get. If the whole point of an EVF is that you get a WYSIWYG preview of what the final image will like like, then it looses a lot of it’s value to me.
Battery Life
Before I left, I took the fully-charged x100s with me on a photowalk down in New Jersey, where over the course of 3 hours I took 102 photographs. I wanted to take a few more, but at 102 pictures that the battery completely died. This was worrisome. The last thing I needed while walking around the back streets of Venice was to run out of juice.
In the end this fear was unwarranted. Even though I always kept a charged spare in my pocket, I never needed it. But then I didn’t take very many photographs each day, averaging about 80, under the 100 picture cliff that I had fallen off on my test run.
Sounds
The Fuji x100s is a VERY quiet camera, almost too quiet. There’s a selectable shutter sound that will play out of a small tinny speaker on the bottom to let you know when it takes a pictures. I turned mine off because it felt like an iPhone to me. I don’t want it to “play” a shutter sound, I want a shutter sound. Not a loud one, just an audible click so that I can tell when the picture gets taken. Over the course of the trip I handed the camera to a dozen of other photographers to take pictures of us at various locations, and every single person took a picture then looked up puzzled, wondering if the camera worked.
The one time that the silence was awesome was while taking illegal pictures in places where photos were forbidden. I snapped a few in the Sistine Chapel for instance, from the hip, and no one was the wiser. I didn’t really need to take those pictures, better ones undoubtedly exist in the world, but I like to live life on the edge. Mostly I just wanted to see how they would come out.
Handling
If I have fault with the x100s it’s with the quirks of its handling. I loved the physical knobs for shutter speed, aperture, and exposure compensation; those were nice and feel great. My hang ups were with the digital interfaces. The menu system was fine once you got familiarized with it, but I found the dial around the 4-way pad to be far too easy to turn. I changed settings accidentally while trying to click through the menu items, especially in the Q for ‘quick’ menu which let you fiddle with ISO, flash, custom presets etc.
I also could not get comfortable with the shutter release. I never felt like it took the picture when I wanted to take it. Either I didn’t half-press early enough so that there was a delay before taking the picture, or I half-pressed a little too hard so that I took the picture before I was ready. I think the only way I could use this camera in a split-second kind of situation would be in manual focus and exposure mode where the camera didn’t have any decisions to make. When it had those jobs to do, I felt like I was waiting for it to finish. Even with the physical aperture ring set to f/5.6 for instance, the lens still starts wide open has to stop down before the shutter fires before each shot; there’s always a slight delay. It is definitely not the ‘Ooh, look at that! <instantaneous snap!>” camera that some other reviews have touted it being. It’s not even close to the shutter on a manual film camera. If there was a time element involved in getting a picture, the camera was slowing me down.
Accessories
On the advice of David Hobby I ordered an inexpensive hood and quality UV filter for the front of the lens so that I wouldn’t have to worry about the lens cap, which tended to fall off. The problem with using the hood is that it obscures about an ⅛ of the frame when you’re using the OVF, but that would be true with a hood on an analog rangefinder too. Also note that the cheap hoods tend to become loose if you take them on and off a few times. I lost mine on a bus in Rome when it popped off while I was trying to exit out the door. Luckily, it only cost $12. The better plan would be to superglue the mounting ring and hood together before you screw it on.
If you’re going to get this camera, make sure you order an extra aftermarket battery or two. They’re only about $10 a piece on Amazon and could save your bacon if you take a lot of images on an outing.
Lastly, I’d like to mention an accessory that I really liked. JB Camera Designs was nice enough to send me one of their Grip Cases. It is a soft plastic half case which slides over the bottom of the camera and stays in place with a screw into the tripod mount. This protects the bottom of the camera when you put it down and stops the rear lcd from getting scratched if it falls on it’s back. The case also gives your right hand a little more bulk to hold onto, and due to the textured surface, the camera is less likely to slip out of your hands. Seriously, for $35 you can’t go wrong.
I also taped up some of the exposed metal for the trip, both to protect it from scratches and to make it even more incognito. A number of people thought it was an old film camera, exactly what I wanted them to think.
Conclusion
 I mentioned on the podcast last week that returning to my Canon 5D Mark III for a shoot the day after I returned felt like getting into a Porsche. It’s a far more responsive camera than the Fuji, but then they’re not really playing in the same league. The x100s is a very different tool. In those situations where I had time to fiddle and play to get the picture I was looking for, the results are outstanding. However, I often felt like I was fighting the camera a little bit to get those results. I love the sensor, I love the physical knobs, I love the design, but ultimately it never ‘disappeared’ in my hands. To be fair, I only took 602 pictures the whole week so it’s not like I’ve shot tens of thousands of images with it, but then again, the camera didn’t really make me want to take 10,000 pictures. So who is at fault?
Ultimately, as far as the trip was concerned, I think I made the right choice. The Fuji x100s helped me make some lovely photographs and my back was very happy to not to be lugging around a Canon system that weighed 3 times as much. Much like the Millenium Falcon, the x100s has got it where it counts, kid. The lens is sharp and contrasty, the sensor is amazing, and the body of the camera harkens back to the late 1970’s in a good way. I just wish the modern sections of the camera were as elegant and well performing. My conclusion is that it’s a great camera, but it’s just not the best camera for me.
—–
If you’re planning on purchasing a Fuji x100s from Amazon, do it through this link and help support the site.
Fuji x100s First Impressions
This is certainly not going to be a full review of any kind. For now it’s merely a list of observations from my first few days of owning the Fuji x100s from the point of view of a Canon dSLR and Leica M4 user. Here we go:
– It’s small, somewhat smaller and lighter than I expected. I have a JB Camera slip-on case coming that will add to the bulk just a bit, perhaps enough for it to fit my hand a little bit better. Overall it’s almost exactly the size of the broken Canonet I bought off of ebay a few years ago.
– The battery life is pretty horrible, but take that with a grain of salt as I’m typically used to my 5D3 which gets 1500 photos on a battery. So many that I don’t carry and extra or a charger with me on vacation. I already bought an extra aftermarket battery on Amazon.
– Also added an aftermarket lens hood so that I could worry less about the lens cap and scratching the front exposed element of the lens. However at this focal length the hood covers a good 1/8th of the frame, sort of putting a poison pill in the use of the otherwise lovely OVF. And I bought this camera because of the optical viewfinder.
– The lens and image quality of even jpegs straight out of the camera is superb. As is the auto white balance, which is something my Canon cameras have never done particularly well. Here’s a 100% crop from the image above. Again, straight out of the camera. Oh and it was taken at 1600 ISO. Try to get a color image on ISO 1600 film that looks that nice.
– It is does not however have the same feel or responsiveness as a more simple and manual camera like the Leica M. Even with settings optimized to ‘high performance’, manual exposure, and the use of manual focus it feels like too much computer between me and the shutter. I feel required to ‘half-press’ to have it ready. Maybe this will improve the more I handle it, but it’s a little frustrating coming from cameras which take a picture the instant you press the shutter. It feels like the exact opposite of an extension of me, at least so far. Maybe I’m missing something, but this feels much more like an overachieving compact than a slimmed down digital rangefinder.
– It’s quiet alright. For me it’s too quiet. To the point where I have a hard idea knowing when the picture is being taken. Tactile feedback it does not do well. Oh, and a crappy 8 bit recording of a shutter sound being played through a 1cm speaker is not the panacea that they’d like to make you think it is.
– While I get the handiness of the Q menu, the thumb wheel is way too loose and responsive, to the point that I end up changing settings when I’m trying to move between menu items.
– I can’t quite get the View Mode to be what I want it to be. I want to change settings and see image playback on the rear screen and only picture taking in the viewfinder, but I can’t seem to make that happen. I end up getting the viewfinder on the rear screen and settings in the viewfinder far too often. Can’t it just act like every other digital camera I’ve ever used in this regard?
So, overall some good stuff and some bad stuff. Overall I like it, but it’s handling is very very different than the Canon’s I’m used to. Tomorrow I’m going to take a nice long walk with it and see if she and I can become better friends. I want it to disappear for the trip to Italy that I have coming up. That’ll be the ultimate test.
Scanning Film with a Camera – My Test
So I was doing a little research about film scanners today and came to realize that most of what’s left in the market are either way too cheap and low-res (basically to preserve family photos) or too expensive and from companies I can’t trust will be around in 6 months. I’ve been unsatisfied with scanning on my Epson 4990. It’s fine for large format and even 6×6, but for 35mm I’m never happy with the results. I’ve tried using the film holders and end up with soft images; I’ve tried laying the film on the glass and then have to fight Newton’s Rings.
I remember a few months ago I read a post somewhere about using your dSLR and a macro lens to shoot slides and thought about trying it with negatives as well. In the end I found this post on petapixel which was very helpful. I didn’t have a light table handy, but I had a little battery powered LED light which I diffused through a stack of tissue paper, set the camera up on a tripod with a 100mm macro lens and pointed it straight down toward the film The results are very impressive. Now these are not the sharpest film shots ever, but they give you some idea of the quality you can get out. MUCH better than I’ve ever gotten from my flatbed and using gear I’ve already got.
I tried some color film as well with less than ideal results. The color temp and spectrum of the LED just wasn’t up to the task. Color negative film is REALLY hard to get the color right when scanning, in my opinion. The only time I’ve ever gotten great results was when I rented time on an Imacon with custom profiles for each film type.
TIP: Use live view and 10x magnification to get the focus right. Also stop down on the lens a bit to get to the sweet spot and handle any slight depth of field softness.
Here’s a 100% blow-up of the above:
Leica Battle – M4 vs M7
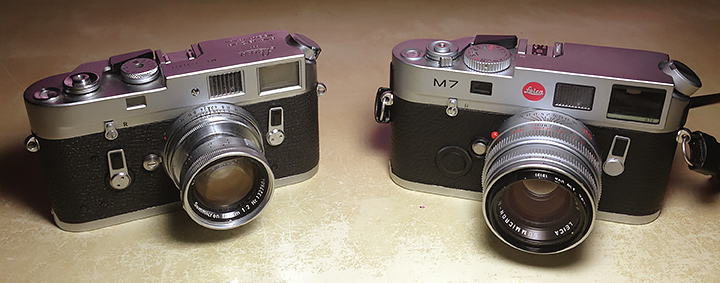
I’m a fan of Leica rangefinders. I have been since I bought my M4 back on the last day of 2007 as a gift to myself for completing 365 Portraits. At the time, I bought the M4 because it was the last of the really handcrafted German Leicas that was all manual (and not the slighted M5). That, plus the fact that it was as much as I could afford with good conscience. I wanted it to be slow, and deliberate, and mechanized.
In hindsight, I really should have bought an M6 — that way I’d at least get a built-in meter so I wouldn’t have to carry one around wherever I went as well. But regrets should be left in the past and I’m very happy with my M4. It’s not just a great camera (and I spent 30 minutes clicking and re-cocking the shutters of several before I decided on mine); it’s also an instrument to measure specific amounts of light.
Fast forward to this past weekend when I was visiting some family out in New Jersey and was offered the host’s M7 to borrow. I was a little apprehensive about borrowing such a lovely and valuable piece of kit, but I’m certainly able to take care of nice things and wanted to try out the last evolution of a film Leica.
Direct comparisons of the photographic results are both impossible and meaningless. The older camera has an early collapsible Summicron mounted on it, which is I’m sure inferior to the brand new model. I will say that the pictures I took on the M7 came out technically as great as they should for a tool at this level. Instead, most of what I’m going to talk about is handling and the differences in feature set that are interesting.
What does the M7 do that the M4 does not? Well, a couple things that matter to me. It has a meter (which requires batteries that I needed to replace) and an aperture priority automatic exposure mode — GASP! That’s right — it took until 2002 for them to add any sort of automatic exposure modes to the M. Basically, you put the shutter speed wheel to AUTO and it’ll take care of the rest based upon the aperture you set on the lens barrel. Because of the Av mode, they also added the ability for the camera to read the film speed using the DX standard. As an aside, I didn’t notice that you need to set the wheel on the back of the camera to DX to get that to happen. I was shooting 400 speed film the other day, but accidentally had it set to 200 for most of the afternoon. Therefore, my film was about a stop overexposed, but that’s OK because b/w film, even the C41 variety does that pretty gracefully. You can also use this wheel to dial in an exposure compensation for the Av mode. Finally, there is now a power switch/lock around the shutter button that you have to remember or else you’ll chew through the battery.
See? You add one little AUTO mode and the number of things you’ve got to worry about goes from 2 to 9, and this is where my slight frustration with the M7 lies. Sure, I could use it in all-manual mode and carry a handheld meter, but at that point I might as well use the M4. Also, shutter speeds other than 1/60th and 1/125th are unavailable if your batteries die because the shutter is now electronically controlled. More accurate than gears, I’m sure, but kind of missing the point of a classically mechanical camera. Ultimately, the purpose of the M7 is to be able to use the electronics, so I’m going to comment on it from that perspective. There was also a strange thing where every once in a while the shutter wouldn’t operate when it was in Av mode even though the viewfinder was popping up with a nominal shutter speed like 400th. It was probably operator error. Oh yeah, there’s also now a display in the viewfinder.
“Bill, stop complaining!” you might say, and I will. Certainly if someone brought me both of these cameras and said I could have only one, I’d choose the M7 due to its overall versatility. It’s a lovely photographic device, for sure, but for all its visual and evolutionary similarities, in some ways it’s a very different machine than the older models like my M4. I have a sentimental attachment to mine, of course, so maybe that’s it. But there’s something about the batteries that places the M7 closer in my mind to my 5D than my 4×5. It’s a decidedly modern camera in a way that even the M6 is not. Not sure what to make of that.
As a final addendum, while at the Leica store for replacement batteries, I got to spend a few minutes with the latest digital M. One word: “Yum.” $8000 of yum? No, not for me unless I win the lottery, but very nice nonetheless. I just really wish they’d kept the level for cocking the shutter instead of replacing it with a motor. Where am I supposed to put my thumb while holding it?
8/1 Ring Light
I’ve decided to do an edition of five 12×12″ prints of this photograph for $60.

